Are you looking for some DIY room divider ideas? If you are looking to remodel your living area, establish distinct zones, or add a little bit of privacy, you are at the right place.
Room dividers are adaptable options for creating smaller and private places inside larger areas, improving the functioning and overall appearance of a room.
These DIY room divider ideas offer a variety of solutions to meet your needs, regardless of whether you live in a studio apartment, an open-concept loft, or simply want a flexible layout.
You’ll discover concepts that accommodate different preferences, spending limits, and levels of expertise, enabling you to make unique room dividers that showcase your individual style.
This post will give you 30 useful and original room divider ideas that you can quickly use in your own home.
So let’s get started and explore the countless options for making lovely and useful room dividers that can boost your home’s decor and transform how you live!
Amazing Ideas to Unleash Your Space
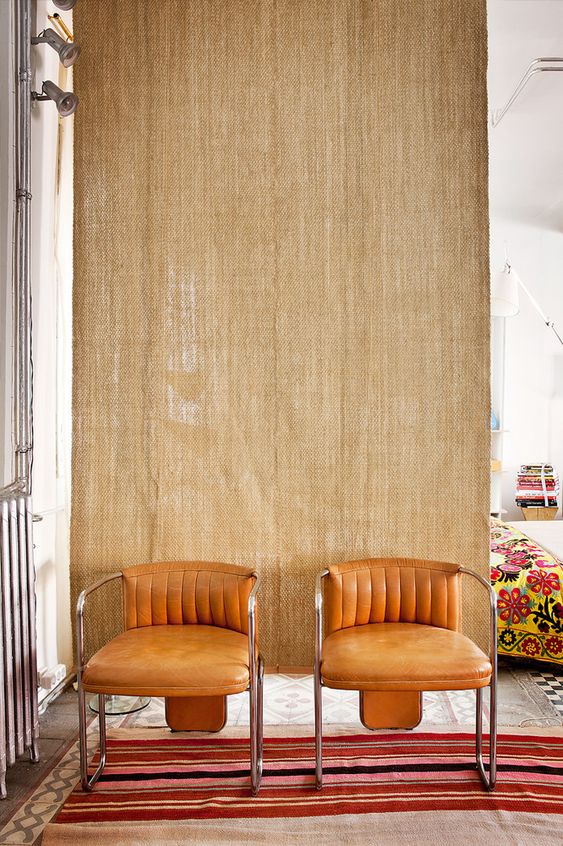
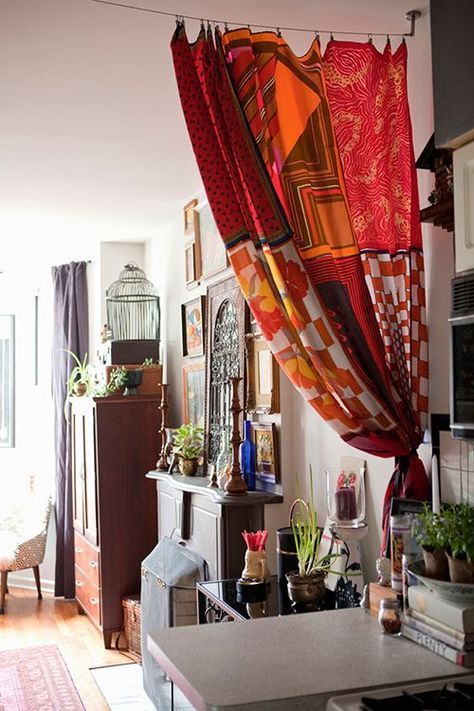
1. Hanging Fabric Panel Divider
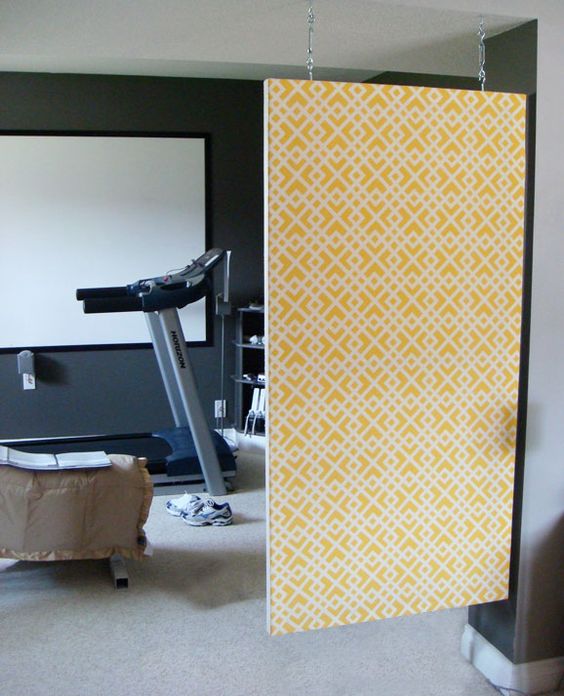
Choose breathable materials with a range of hues, designs, and textures. To create movement and visual interest, experiment with the panel length.
Use thicker materials for extra seclusion or sheer fabrics for a delicate, airy look. The panels can be easily installed.
2. Potted Plant Divider
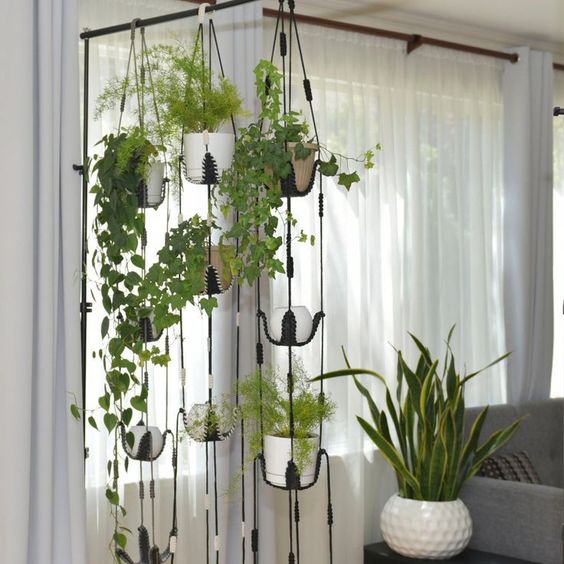
Pick low-maintenance indoor plants that thrive, like bamboo palms, peace lilies, or snake plants.
Create a natural and energizing partition by arranging the plants in beautiful pots of various sizes and heights. A small shell or ledge can also be added to exhibit tiny potted plants or other decorations.
3. Macrame Wall Hanging
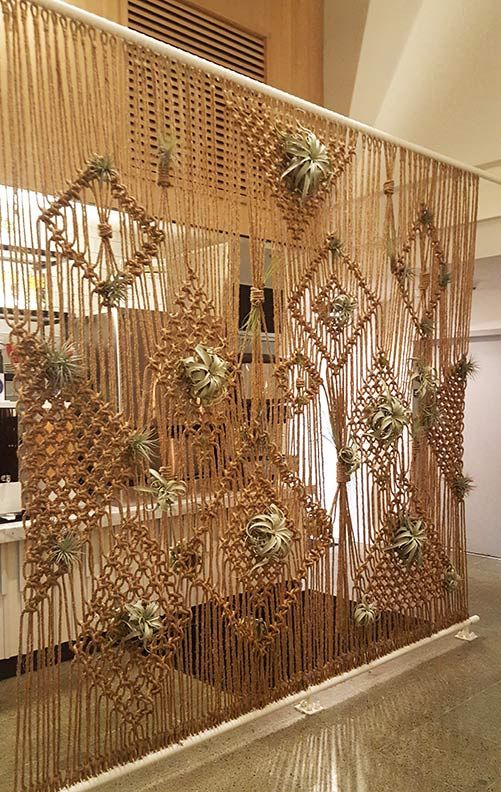
To make complex patterns and designs, learn the fundamental macrame knots and methods.
To obtain the desired look and texture, experiment with several types of cords, such as cotton jute or macrame rope. For increased aesthetic appeal and decorative components like feathers or beads.
4. Repurposed Bi-Fold Doors
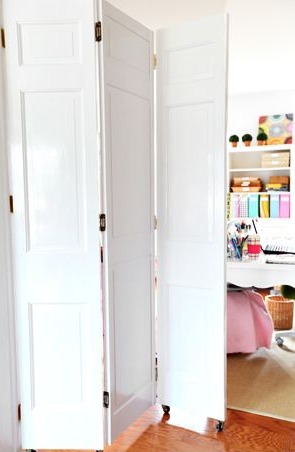
Think of painting the bi-fold doors with a solid color or using various hues to create an ombre effect. Apple wallpaper or contact paper with an adhesive instead to add patterns or texture.
Using a stapler or glue, attach fabric panels to the doors, making sure they are spaced evenly. Distress the doors and add antique hardware for a vintage look.
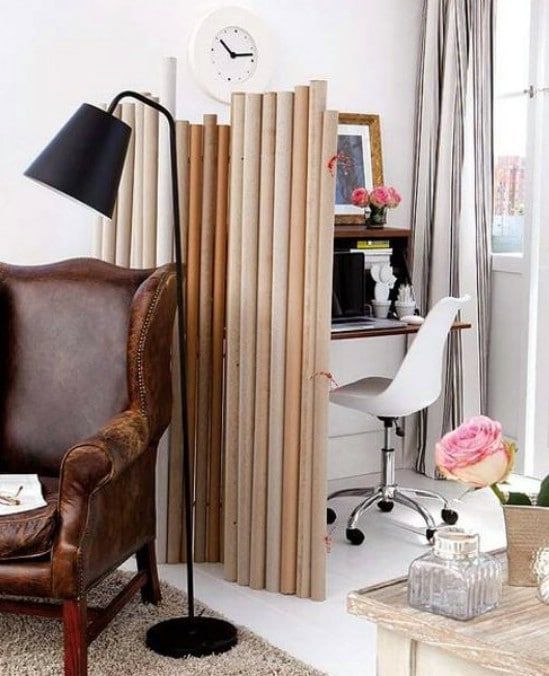
5. PVC Pipe Divider
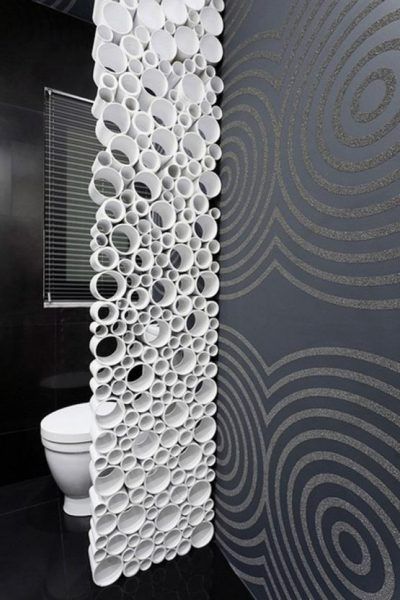
To build a sturdy frame, cut PVC pipes to the required length and attach them with elbows and t-joints. Curtain clips can be used to suspend fabric panels, or fabric can be wrapped around the pipes.
For a different and eye-catching effect, use clear PVC pipes filled with colored water or LED lights as an alternative.
6. Book Page Divider
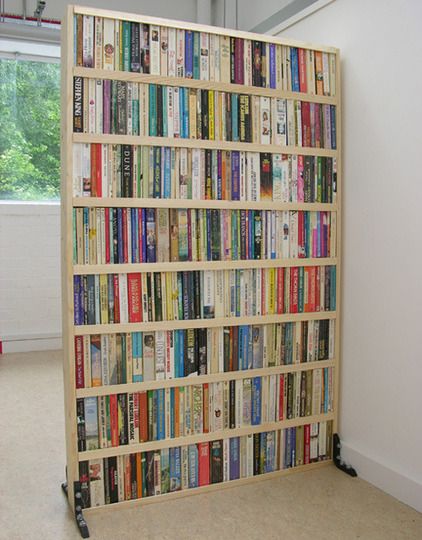
Select books that fit your style or hobbies and have attractive drawings or photographs. The sheets should be securely fastened together using binder rings or a hold puncher.
For simple installation, hang the book divider from the ceiling or fasten it to a freestanding frame.
7. Rope Partition
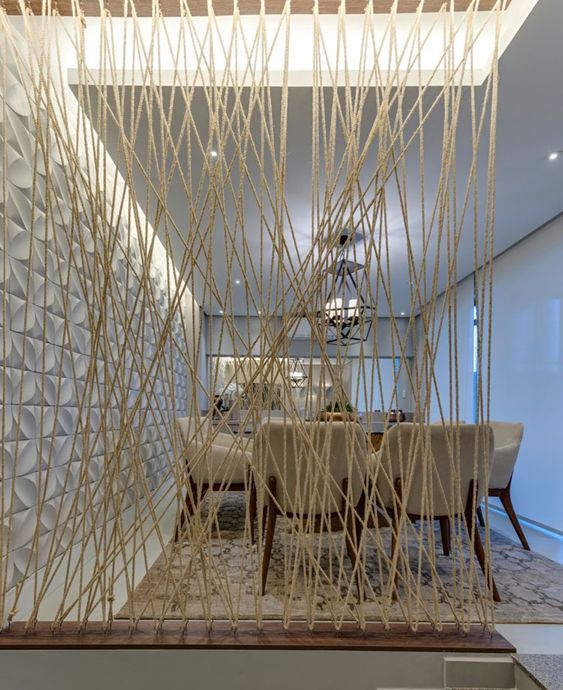
To obtain a rustic and beach effect, choose thick ropes made of natural materials like jute or sisal. Make sure the ropes are securely fastened by attaching them to strong hooks or eyelets on the opposing walls.
To make original designs or integrate ornamental components like wooden beads or shells, experiment with different rope thicknesses and knotting methods.
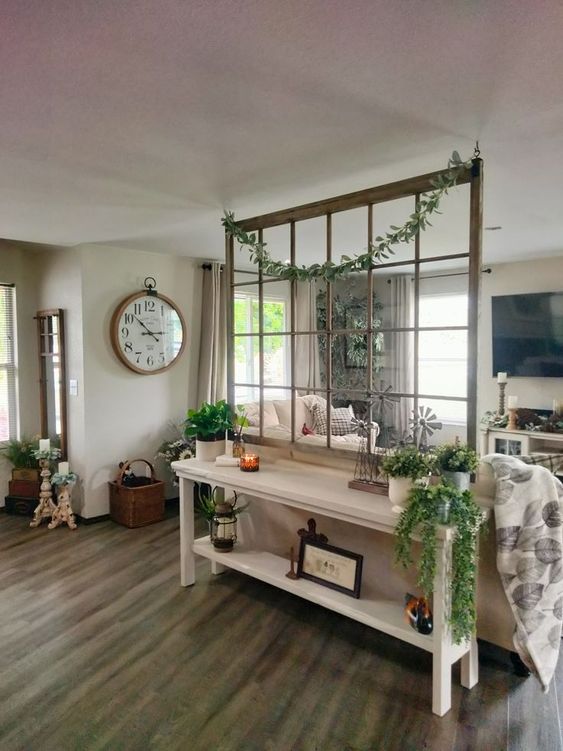
8. Windowpane Divider
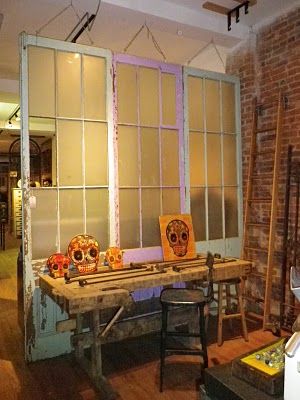
Vintage or salvaged window frames can have their glass panes removed and replaced with fabric panels, acrylic sheets, or frosted glass.
Alternately, leave part of the glass panes open to let natural light in. To improve the aesthetics, think about including decorative components like vinyl decals or stained glass inserts.
9. Woven Room Divider
Pick a wire or wooden frame with gaps or holes that are evenly spaced out of the fabric strips, ribbons, or even strips of used t-shirts to be woven through.
To produce a distinctive and textured impression, experiment with various weaving patterns like plain weave, twill weave, or basket weave.
For a balanced appearance, firmly fasten the strips to the frame and make sure they are spaced equally.
10. Bamboo Roll-Up Blinds
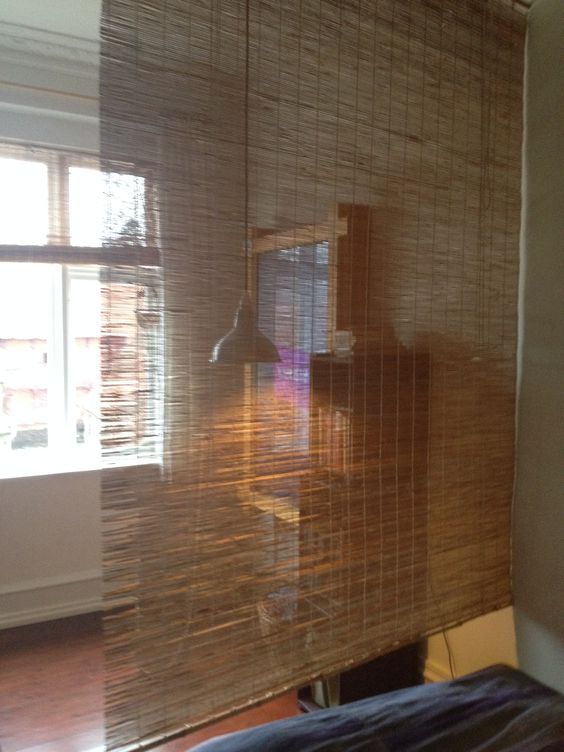
Choose bamboo blinds in neutral hues, or think about painting them a color that goes well with the decor of your home.
The blinds can be set up with hooks or screws so they can be simply raised and lowered. To manage the amount of light and privacy required in each section of the room, adjust the blinds.
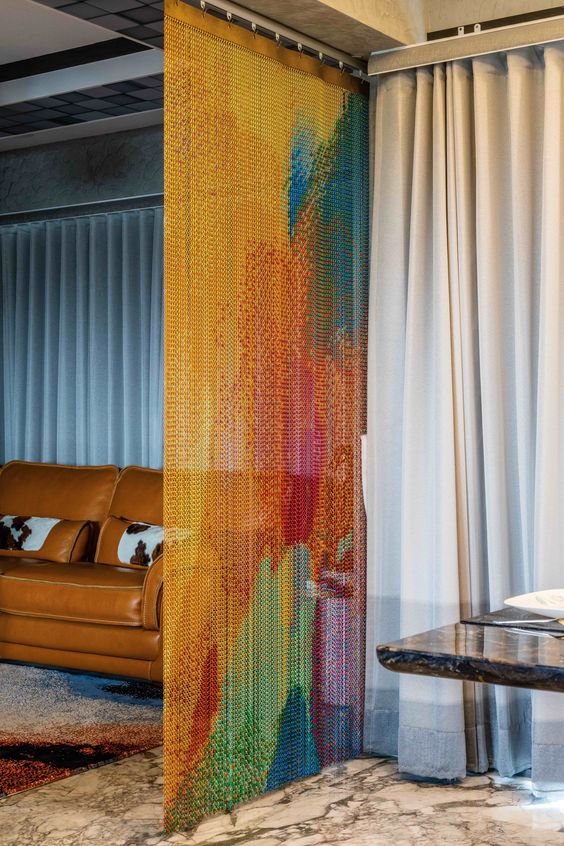
11. DIY Bearded Curtain
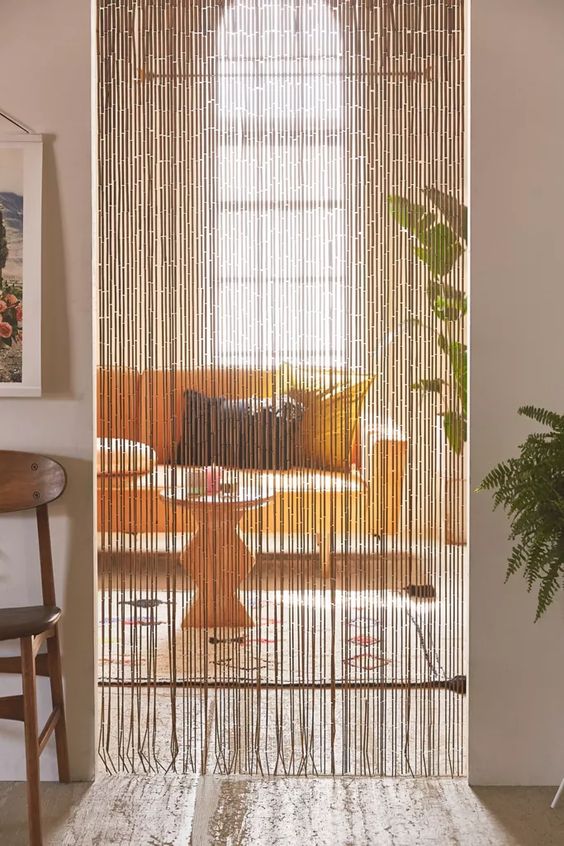
Pick beads that come in a variety of sizes, shapes, and materials, such as glass, wood, or acrylic.
Make sure the beads are uniformly spaced and fastened at both ends before threading them onto strong threads or fishing lines.
Hang the beaded curtain from a tension rod or a curtain rod to create a glistening waterfall effect.
12. Hanging Panels
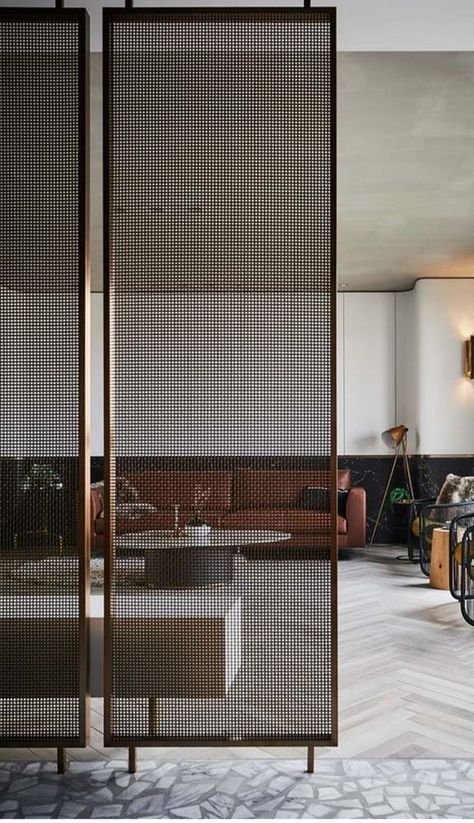
To make a dynamic and eye-catching display, use a selection of fabric with various patterns, colors, and textures for your fabric panels.
Staples or hooks are used to attach the cloth panels to the wooden frame. Instead, choose wood panels from the ceiling using wire, chains, or hooks.
13. Shutter Screen Divider
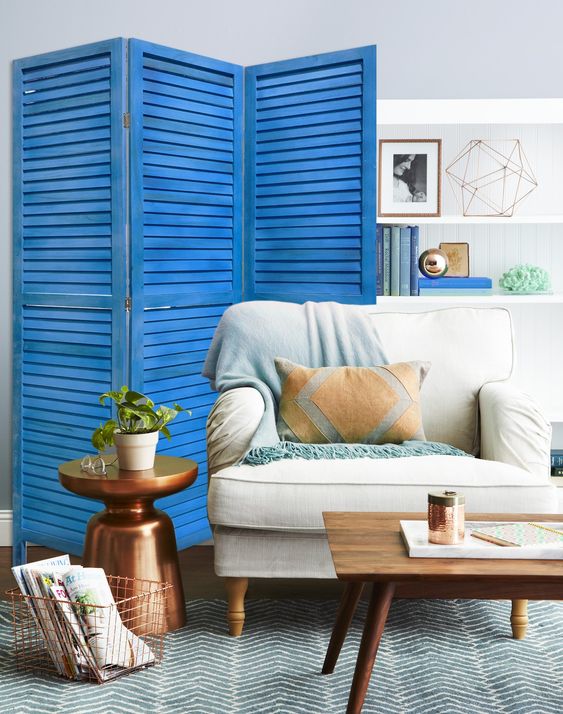
To give the shutters an aged and old appearance, think about distressing them. The shutters can be left in their current state or painted in vivid hues to offer a pop of eye-catching flair.
Hinge the shutters together to keep them sturdy and allow them to fold or stand independently as a room divider.
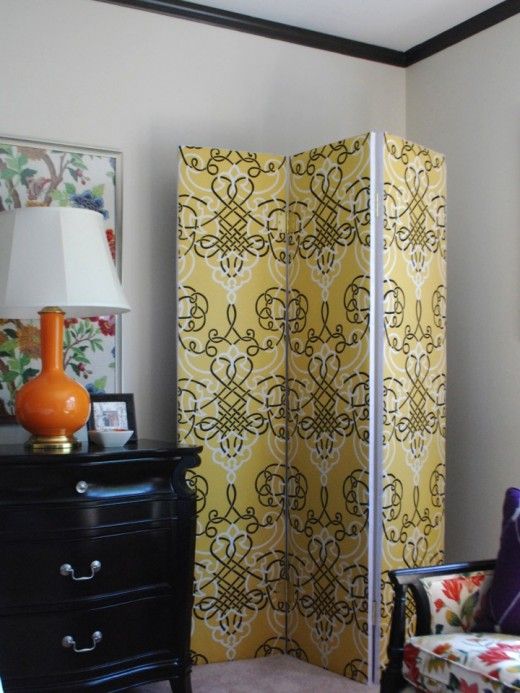
14. Stenciled Folding Screen
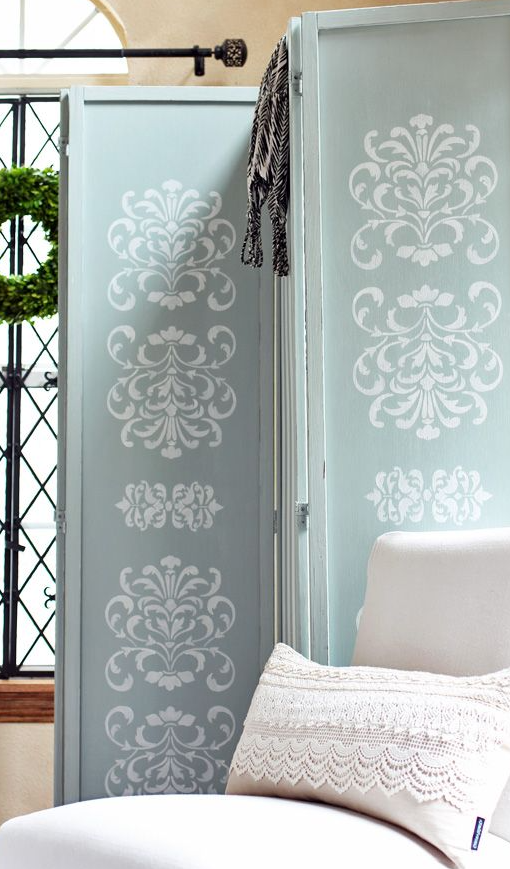
Choose a folding screen with numerous panels and a smooth exterior. Paint complex themes or patterns on each panel using stencils or your own creations.
To get the desired impression, experiment with various paint colors and finishes, such as metallic or ombre effects. Before using the screen as a decorative room divider, let the paint completely dry.
15. Ribbon Divider
Pick ribbons in a variety of lengths, hues, and materials such as satin, grosgrain, or velvet.
Make sure the ribbons are long enough to extend from the ceiling to the floor or to the required height before cutting them to the necessary length.
With the ribbons equally spaced apart, fasten them to a rod or dowel. The ribbon partition should be hung from the ceiling so that the ribbons can flow down and make a fun and vibrant wall.
16. Recycled Window Frames
The window frames should be sanded and painted in a color that goes well with the design of your room. A rustic or old appearance can also be achieved by leaving the frames alone.
Hinge the frames together to keep them stable and able to stand alone or be fastened to a wall for support. Attach fabric panels, mirrors, or pieces of art inside each window frame to the visual interest.
17. Fabric Swag Divider
To create a soft and ethereal vibe, choose lightweight, flowing materials like chiffon, voile, or sheer drapes. Utilizing hooks or sticky strips, drape the cloth swags at various heights across the ceiling.
Allowing the cloth to hang elegantly will create a beautiful, romantic barrier that gives the space a sense of class.
18. Twinkle Light Curtain
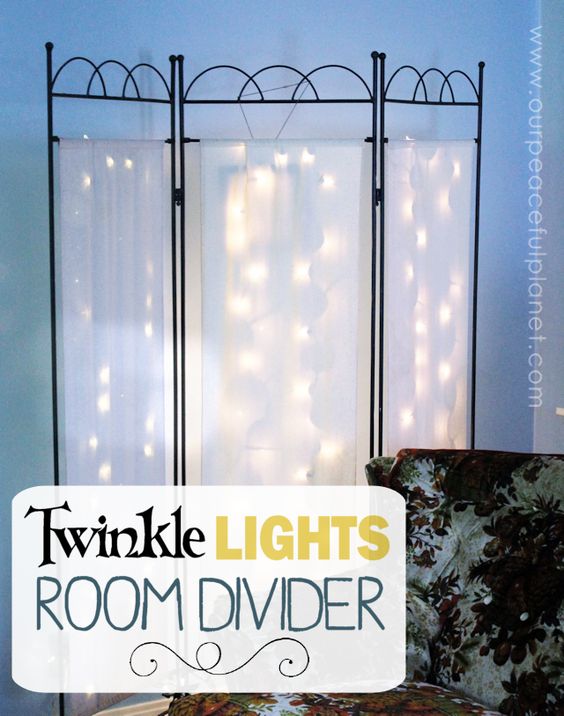
For a wonderful and enticing look, choose LED fairy lights or string lights with tiny, delicate bulbs. Using hooks or sticky clips, hang the lights from the ceiling so that they hang down like a curtain.
To make a delicate and imaginative room divider, think of weaving the lights with sheer fabric or tulle for added aesthetic appeal.
19. Cardboard Tube DIY Room Divider
Gather cardboard tubes of various lengths and diameters, such as those from paper towels or wrapping paper rolls.
A strong and attractive frame is made by cutting the tubes to the correct height and joining them with glue to hot glue.
The tubes can be wrapped with beautiful paper or fabric or painted in colors that go well with your decor. Make sure the tubes are evenly spaced for stability, and arrange them in a pattern or design that you want.
20. Fabric Sliding Panels
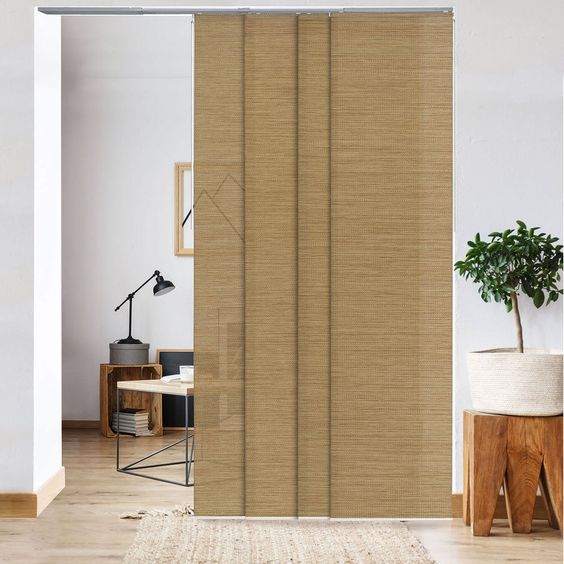
Choose broad fabric panels in hues or designs that go with the overall motif of your area. Install a track system on the ceiling so the panels may move open and close easily.
Individual sliders should have the fabric panels attached to them, with just enough overlap to eliminate gaps.
You can simply alter the design of your area with this sliding panel system, which allows you to create open or closed divisions effortlessly.
21. Repurposed Ladder As DIY Room Divider
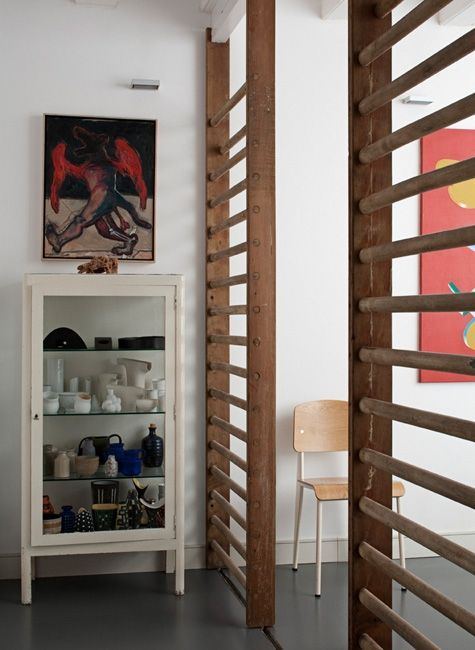
If you want to give the ladder a more rustic look, leave it natural rather than paint it to match the decor of your space. Use brackets or stands to mount the ladder vertically for stability.
You have the option of adding shelves to the ladder rugs if you want to display tiny plants, books, or decorative items.
Your space feels more transparent because of the open ladder’s design, which also adds a unique and practical feature.
22. DIY Room Divider Using Paper

Large ornamental paper or wallpaper sheets should be cut into panels of the same size. Make sure the panels are firmly connected by attaching them to a wooden frame with adhesive or staples.
To add visual appeal, think about utilizing patterned or textured paper. With this lightweight, reasonably priced room divider, you can express your creativity and alter the design to fit the style of your space.
23. Upcycled Shutter Screen As DIY Room Divider
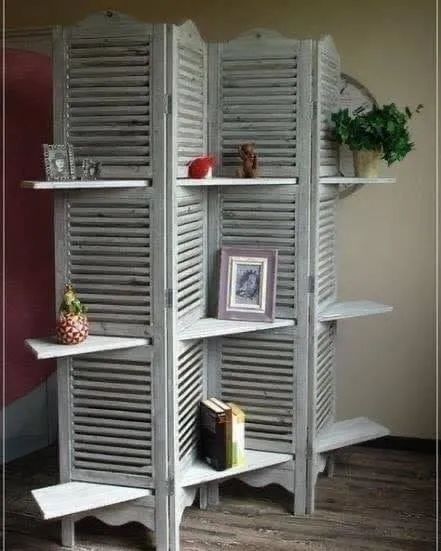
Repurpose outdated shutters into a chic room divider to give them a new use. Sand the shutters and paint them in the color of your choice, making sure they match the furnishings in your room.
The shutters are joined by hinges, enabling them to fold and stand alone. The shutters’ slatted form lends a charming touch and allows light to enter while maintaining privacy.
24. Folding Cardboard Divider
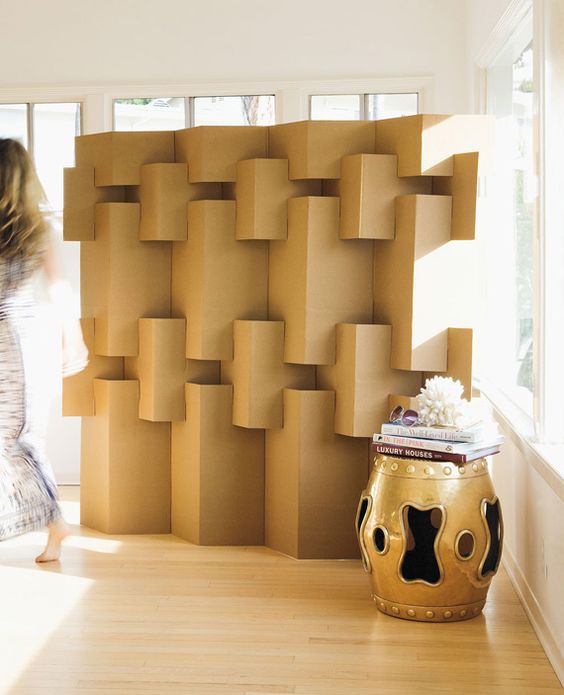
Cut and fold cardboard panels to make a cheap and temporary room divider. The cardboard’s lightweight makes it easy to move, and you can personalize the divider by painting it or covering it in fabric to match the style of your home.
25. Hanging Rope Shelves
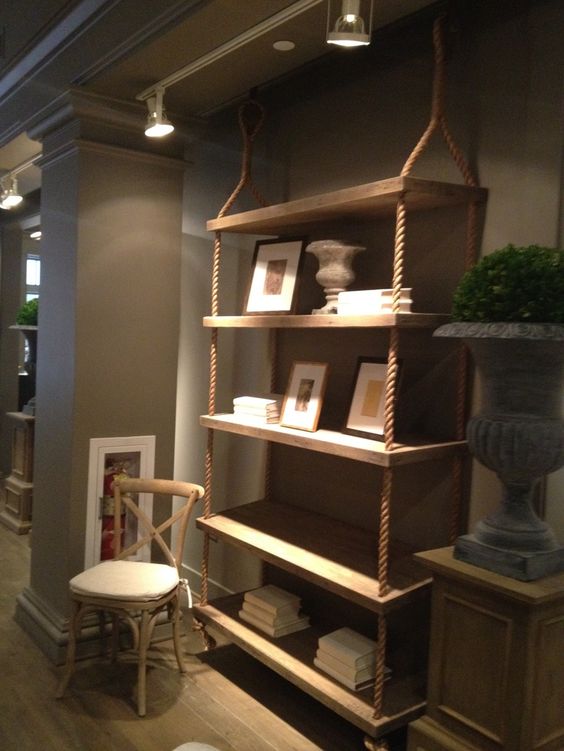
Installing hanging rope shelves will improve both the use of storage and the partition of space. Secure wooden shelves at various heights using strong ropes that are attached to the ceiling.
In addition to providing useful storage space, these shelves also help to divide the space aesthetically.
26. Room Divider Screen with Mirrors
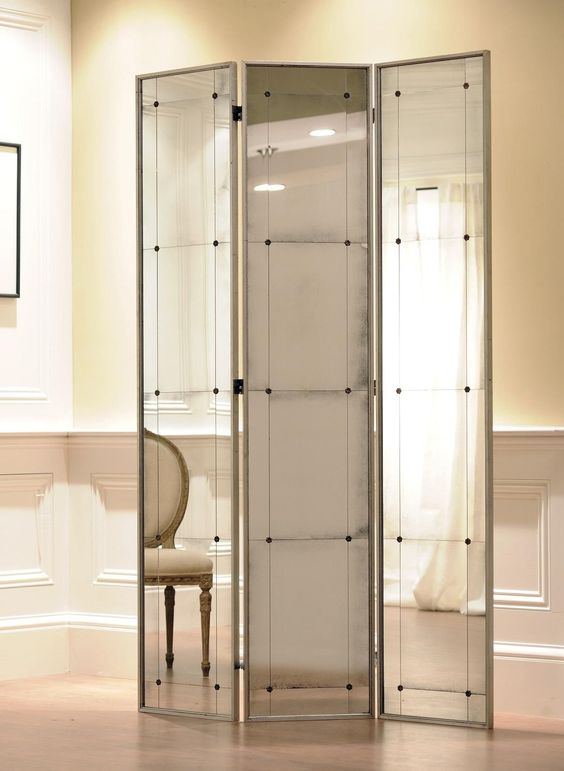
Build a folding screen out of the wooden frames and add mirrors to the decor; mirrors provide beauty to the room divider in addition to increasing the sense of space and reflecting natural light.
Paint the frames or add artistic details to make them more your own.
27. Vertical PVC Planter Divider
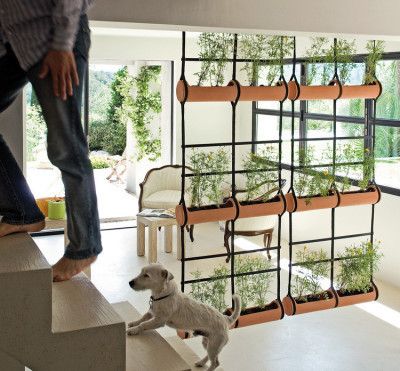
By using PVC pipes to create a vertical planter room divider, you can combine usefulness with greenery. To hold potted plants, construct a frame out of the vertical pipes and join horizontal pipes at regular intervals.
With the addition of plants, this partition not only aesthetically divides the area but also adds a dynamic and energizing element.
28. DIY Geometric Panel Divider
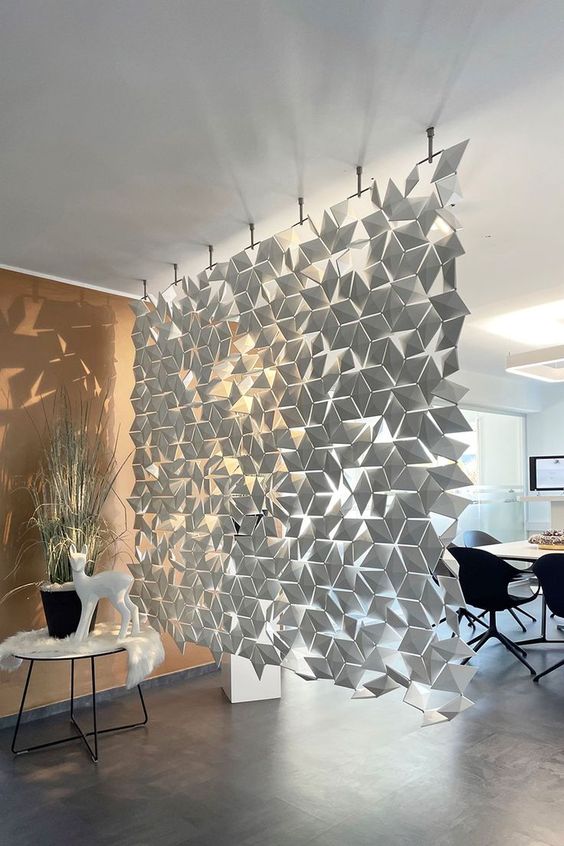
To create a distinctive and eye-catching room divider, use your creativity with geometric shapes.
Wooden panels can be painted in contrasting colors after being cut into various geometric shapes, such as triangles or hexagons. Set up the panels to create a free-standing partition that serves as an eye-catching room focal point.
29. Repurposed Fabric Panel Divider
Create a fabric panel for a room divider out of the leftover fabric or bed linens to give them a new use.
Utilizing rods or dowels, hang fabrics with patterns or hues that compliment your style from the ceiling. This Do-it-yourself partition maintains seclusion while adding a delicate and vibrant touch.
30. DIY Branch Divider
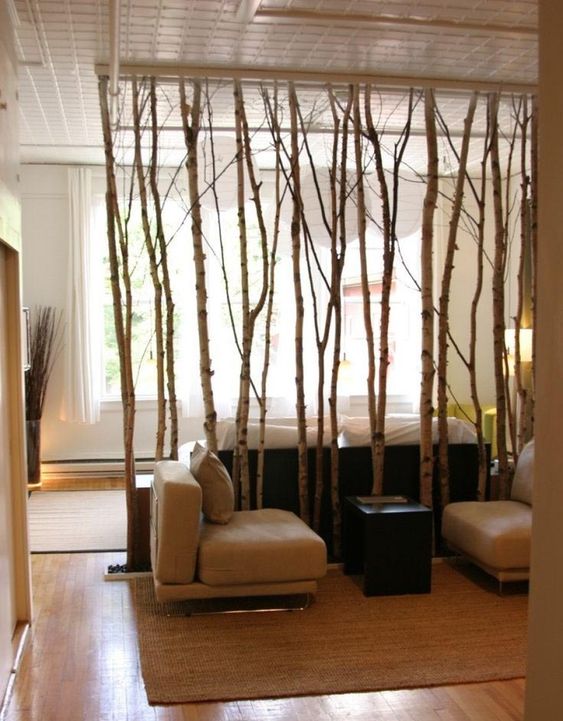
You may include the look of nature in your design by arranging tree branches of various lengths and sizes.
If desired, clean the branches, paint them, and then join them with screws or wire to make a freestanding divider. The interior has a rustic and earthy atmosphere thanks to the branches’ organic shapes and natural textures.
Summing It Up
All in all, these adaptable dividers provide countless options for personalizing the design of your room. There are many options to consider, from using antique shutters to hanging fabric panels.
Macrame wall hangings and string art room dividers provide options for creative expression if you enjoy crafts.
If you have a green thumb, you may add a touch of nature and liven up the atmosphere by using living room walls or potted plants as room dividers.
Additionally, inventive and green alternatives include DIY windowpane dividers, book page dividers, and cardboard tube dividers.
You may make your living area a unique and useful retreat by implementing these DIY room divider ideas.
Enjoy the process of designing a distinctive partition that improves your house and shows your sense of style. Let your imagination soar.