Privacy fences, or boundary fences, are structures built to surround and safeguard property from intrusion or trespassing. These fences provide you privacy within your personal space by acting as physical barriers. Having a private space, especially in an era where our lives are increasingly interconnected, is very crucial.
There are many benefits of having privacy fences around your property. They create a visual barrier and protect us from the prying eyes of passersby, snoopy neighbors, and even intruders. Also, you can unwind and enjoy your privacy to the fullest without thinking of getting judged. The purpose of this article is to guide you through some awesome ideas for creating your own DIY privacy fence. We’ll be covering everything, from the tools and materials required to the entire construction process of building a DIY privacy fence.
So, whether you are a beginner or a DIY master, this article will equip you with the required knowledge and details to build your own DIY privacy fence.
1. DIY Wooden Fence
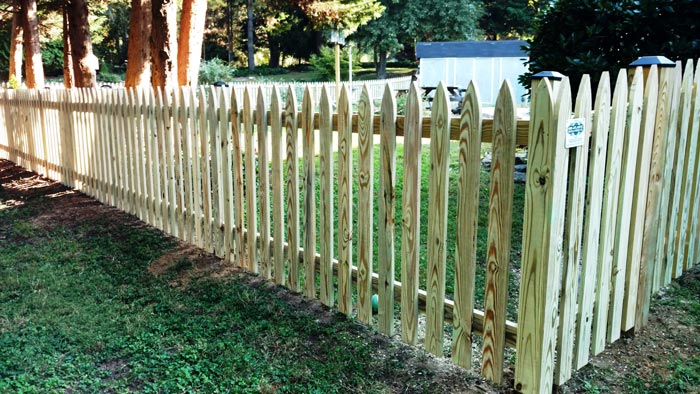
Building a DIY privacy fence can be a rewarding and practical project for homeowners looking to enhance their outdoor space. Whenever we think of a fence around our homes, a nice rustic wooden fence is the first picture we imagine. So, here we’ll guide you on how to create a wooden fence around your property. Let’s get started!
- The first and foremost thing is to gather the materials that you’ll need throughout this project. These are pressure-treated wooden posts, pressure-treated wooden rails, fence pickets, concrete mix, rail brackets, a post-hole digger, gravel, measuring tape, screws or nails, a drilling machine, and a hammer. Some of the items may be extra. However, it is better to have extra items rather than running from pillar to post during the time of construction.
- After gathering materials, you should identify your boundaries and take the required permission from the local authorities. After getting clearance, you can start planning the layout of your fence. Measure the area where you want to install the fence and decide its height. Now, mark those areas using a chalk line, as it will help you guide when you start installing the fence posts. Moving ahead, now you need to dig post holes with the help of a post-hole digger along the marked lines. Place a post in each dug hole and ensure they align with one another. Fill the holes with the concrete mix while following the manufacturer’s details. Once your posts are fixed, attach horizontal wooden rails with the help of a rail bracket. Usually, two rails are attached between two posts, one near the top and the other near the bottom.
- Now the last phase, which is, attaching the wooden pickets vertically to wooden rails. You need to drill these wooden pickets to ensure stability. Lastly, you can give the finishing touches by trimming excess wood from the top if necessary. And there you have your DIY privacy fence. Your job is not yet done; you need to keep a check and maintain your wooden fence for any damage and immediately make repairs when required.
2. DIY Pallet Fence

Another great option for a DIY privacy fence is building a pallet fence around your property. Such a fence can be a sustainable as well as inexpensive solution for creating privacy or even enclosing your pets or domesticated animals, if you have them, in your backyard.
The materials required while making a pallet fence are somewhat similar to what was required when constructing a wooden fence. The basic materials are pallets, which can be procured from scrap dealers or even in the backyard of your home, pressure-treated posts, concrete mix, screws or nails, a post-hole digger, measuring tape, a drilling machine, and a hammer.
- Before starting, decide on the layout and dimensions of your fence. Measure the length and height you want, and determine the number of pallets and posts needed. Make a note if you require any gates or openings when constructing fencing.
- Now, dig along the length of your fence for the posts as well as pallets. Now set the posts in the holes and ensure they are level and keep space for the posts every 6 to 8 feet. Start attaching the pallets in between the posts and also ensure that they are properly set along the dug length. Secure the pallet to the posts using screws or nails, ensuring it is firmly attached. Repeat this process for each pallet, aligning them closely to achieve a consistent appearance. To enhance the stability and longevity of your fence, you can add additional supports by adding medium-sized rocks along the fence.
- Inspect the entire fence to make sure all the pallets are securely fastened. Trim any excess material and sand down rough edges for a tidy appeal. You can also apply a protective coat of paint or stain, if desired, to enhance the fence’s durability and aesthetic appeal. By following these steps, you’ll be able to create your own DIY privacy fence using cost-effective pallets. Enjoy your newfound privacy and the satisfaction of completing this project on your own!
3. DIY Chain Link Fence
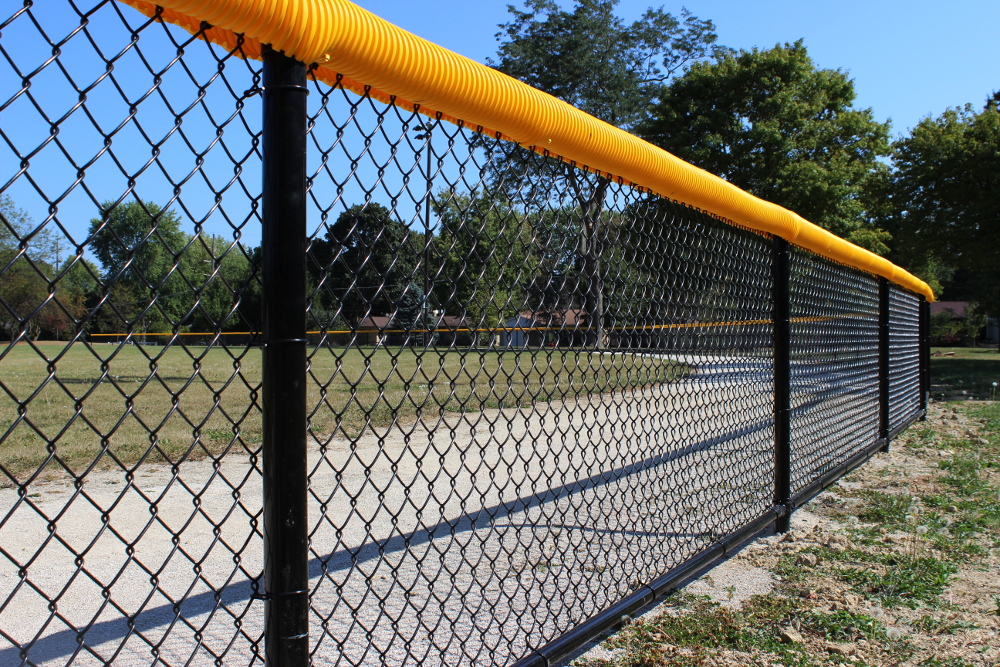
Are you looking to add privacy and security to your outdoor space? Building a chain link fence can be a great solution. A chain link fence is a convenient way of marking your property, keeping trespassers away, or even protecting your pets from going astray. In this comprehensive guide, we will walk you through the process of constructing your very own DIY privacy fence using chain link.
Before you begin, gather all the necessary materials and tools. Here’s a list of what you’ll need, chain link fence fabric, fence posts, rails, tension bands, rail caps, concrete mix, screws, wire ties, measuring tape, a post-hole digger, and pliers.
- The first responsible step is checking with the local authorities and taking the required permissions to get clearance to start this project. Use a post-hole digger to carefully dig holes for your fence posts, ensuring that you don’t damage any gas or water line. Now, firmly place posts in each hole. Add gravel at the bottom of each hole and then fill the holes with concrete mix.
- Now comes the most intricate part, that is, attaching tension bands to each corner and end post. Slide the top rail through the tension bands and secure it in place. Now, you need to attach the top and bottom rails to the tension bands using screws and ensure that these rails are leveled and properly aligned. Now, unroll the chain link fabric along the fence line, starting at one end. Attach the fabric to the first post using wire ties and space them uniformly apart. Continue this process with the remaining posts and tighten them using pliers. The final step is to attach rail caps to the top of the fence to provide added protection and a refined look.
- By following these step-by-step instructions, you can create your own DIY privacy fence using a chain link. Remember to take your time and pay attention to detail throughout the process. You’ll have a durable and attractive fence that enhances your privacy and security while enjoying your outdoor space with some effort and diligent planning.
4. DIY Bamboo Fence
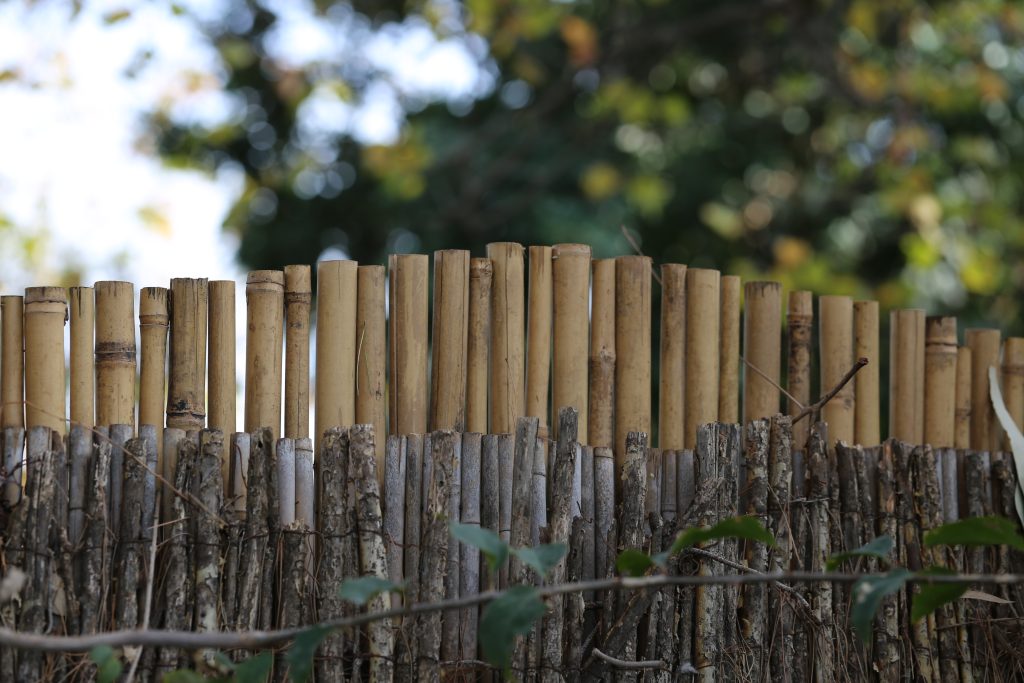
A bamboo fence can be an excellent choice for those looking to create a natural as well as artistic barrier around their home. It provides privacy and a striking outline of your property. So, if you’re interested in building a bamboo fence around your house, then follow the process of building this amazing DIY privacy fence.
You should always start by making the list of materials required. In this case, the main item is bamboo poles, wooden 2×2 poles, wooden 2×4 poles, a machete, string, concrete mix, gravel, a post-hole digger, a saw, measuring tape, a hammer, and nails.
- Now begin by taking permission from your municipal board and getting the NOC. When you’re shown a green flag from them, start all the preparation, like gathering the materials and tools and marking the fence line using string. There are two options when fixing vertical wooden 2×2 posts. First, directly dig holes, using a post-hole digger, at regular intervals along the fence line and place these vertical posts. The second is to make an individual concrete base for each post using square molds and then place them along the fence line. You can choose any option as per convenience.
- After placing these vertical wooden posts, attach two horizontal 2×4 wooden posts between two consecutive vertical posts. One should be near the top end of vertical posts, and the other should be near the bottom. Vertically slice the bamboo poles into parts, using the machete safely. Now, start attaching these sliced bamboo poles vertically with the help of nails and a hammer. Adjust the height of bamboo poles using a saw. Continue the process till the entire fencing is built around your house. After constructing this exquisite fencing around your property, it’s your duty to inspect your bamboo fence for signs of damage regularly.
Well, isn’t it a simple and hassle-free DIY privacy fence idea? So go ahead and try this idea by following this guide. Also, remember that building a bamboo fence is an opportunity to let your creativity add a personal touch to your property.
Summing It Up
All in all, throughout the discussion on DIY privacy fence ideas, we comprehensively covered four popular options – wood fence, pallet fence, chain link fence, and bamboo fence. Each of them comes with its own set of advantages and considerations. Talking about wood fences, they are a classic choice that provides privacy as well as aesthetic appeal. However, they may require more initial investment and regular maintenance.
Now that you’ve explored these various DIY privacy fence choices, it’s time for you to apply all this knowledge, select the one that suits you well, and create your own fencing project. Do not hesitate to experiment and try new techniques and ideas different from the ones mentioned above.
Always remember that a DIY privacy fence requires patience, time, effort, and dedication, but the end result is worth it.

0 Comment
https://potofu.me/pd0v6d5u https://beta.cent.co/lost1587/+ln4aky https://gratisafhalen.be/author/lost1587/ https://www.bourse-du-sport.com/author/lost1587/ http://www.annunciogratis.net/author/lost1587